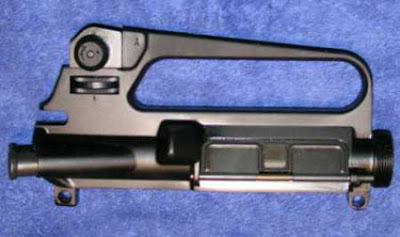
Showing posts with label Iron Sight. Show all posts

Saturday, November 6, 2010

Sights: Iron Sights: Improving Visibility of Iron Sights

In the last few posts, we've studied various kinds of iron sights. Now, one of the desired properties of any type of sight, not just an iron sight, is that they should be easy to see, but should not be bright enough to blind the shooter. There are a few ways that this can be ensured. We will study the methods here.

Since sights should not be very shiny and reflective, particularly the front sight, there are a few ways to reduce glare from the sights. First, there are metal treatments such as parkerizing and ferritic nitrocarburizing, which we studied about previously. These treatments not only apply a protective finish to the weapon, but also reduce the reflective glare. Another way to do this would be to simply apply some non-reflective matte finish paint on the sights. Yet another way is to bead blast the sights or cut serrations on the surface to make them less reflective. Finally, some sights have a hood around them to shade the sights and reduce the glare.

However, there is another problem to consider too. The sights should not be dark enough that they merge in with the background. There should be sufficient contrast between the sights and the background, so that they can be picked up much easier. There are several ways to do this as well.

The first method is very simple: the manufacturer simply paints a different color on the front and rear sights to make them stand out more.

In this case, the manufacturer has painted around the square channel of the rear sight with a white paint and painted a white dot on the face of the front sight as well. In other cases, it may just be two dots on the rear sights and one dot on the front sight. Another variant is to put one rear dot in the center of the rear sight and another dot on the front sight. When the sights are lined up correctly, the two dots are aligned vertically, like the digit "8". Another version of this is to have a white vertical line painted in the middle of the rear sight and a dot on the front sight. When the sights are aligned correctly, it looks like a lowercase letter 'i'. Some manufacturers use different colors for the front and rear sights. For example, some people prefer to have the front sight as red or gold colored and the rear sights with white colored paint. Regardless of the method used, these colors provide contrast with the background and therefore make the sights easier to pick up. The image below illustrates the different types of what was just discussed.

Image based off an original image uploaded by user Stannerd on wikipedia.org. The original image was licensed under the GNU Free Documentation license version 1.2 and permission is granted to copy, distribute and/or modify this image under the GNU Free Documentation licence version 1.2 or later.

Another way to make the sights more visible, especially in low light conditions, is to have the sights contain luminescent glass tubes. The most common way to do this is to fill the glass tubes with tritium, a mildly radioactive isotope of hydrogen. Tritium is also used in some luminescent watch dials. The glass tubes are also coated on the inside with a phosphorescent material. As the tritium decays, it emits beta particles that strike the phosphor coating and emit a glow in green, red, blue, yellow, orange, purple or white color, depending on the type of phosphor coating material used. Typically, green, yellow and orange are usually used with weapons. The glow from these tubes is not visible in bright light, so some manufacturers paint additional rings around the glass tubes so that they can be picked up easily during daytime as well.


There is no battery power involved here, as the glow is created by the beta particles emitted by the decaying tritium gas. Since tritium decays very slowly, such tubes have a fairly long lifespan. In fact, one well known manufacturer (Trijicon) offers 12 year warranties for their green and yellow sights. The downside to these are that the price of these is relatively higher than some of the alternatives.

Another method is to use photo-luminescent paint. Unlike the tritium filled sights, which glow at all times, the photo-luminescent paint needs to be exposed to a bright light source first, whereupon it absorbs some energy. When the light source is removed, the paint emits the stored energy out slowly and glows green in the dark. A few minutes exposure to bright sunlight or ultraviolet light is enough to keep it glowing for several hours afterwards.


The nice thing about this method is that it costs a lot less than tritium filled tubes. An existing sight can be easily converted to a photo-luminescent sight by any owner, simply by applying some adhesive strips. The downside is that it needs to be exposed to light first to work and it automatically gets discharged after a few hours and needs to be re-exposed to light again to work.

Another method that is recently gaining popularity is to use fiber optic elements. Short pieces of fiber optic cord are affixed to the iron sights. Any ambient light falling on the sides of the fiber optic cord is concentrated at the tip of the cord. Therefore, the tip of the cord glows brighter than the surroundings and makes it easier to pick up during daylight.
Typical fiber optic sights come in green and red colors. These sights are now seen on handguns, shotguns, rifles, air guns etc. Some manufacturers make sights that combine fiber optic cords with tritium filled tubes, so that the sights may be effectively used in both day and night time.

Thursday, November 4, 2010

Sights: Iron Sights: Adjustable Sights

We have recently discussed the basics of sights, as well as some history of iron sights and the two major types of iron sights, namely the open sight and the aperture sight. There are also other ways to classify iron sights. One would be fixed sights vs. adjustable sights. We discussed fixed sights in the previous post and discuss adjustable sights in this post.

The first sights that were invented were fixed sights and this was in an era where firearms did not really have as much range or accuracy. Once rifling started to become common and barrel making techniques began to improve, the range and accuracy of weapons started to increase. Hence, people found a need to have sights that could work on short ranges as well as longer ranges.

The main problem with fixed sights is that a bullet travels in an elliptical path, due to forces of gravitational pull and aerodynamics of the bullet with the wind rushing past it. Hence, for shooting at greater distances, it is necessary to point the barrel a bit upwards before pulling the trigger. Range is also affected by factors such as amount and quality of propellant in the cartridge, shape and weight of the bullet etc. Making appropriate adjustments for greater range is called elevation. With fixed sights, it is harder to decide how much to to tilt the barrel up by. With adjustable sights, this is less of a problem.

There is also movement in a horizontal direction to be considered. Due to rifling in barrels, the bullets generally tend to drift a bit from the center point. As we mentioned earlier, rifling does NOT make bullets travel in a straight line, but it gives them a predictable drift. What this means is that if you can predict for a given rifle that a bullet will drift horizontally, say, between 2-3 cm. to the right over every 100 meters distance traveled, you know that you need to compensate by the same amount to the left for every 100 meters distance to the target. There is also the need to compensate for wind blowing, which could cause horizontal deviation of the bullet. Other causes of deviation could be the profile of the bullet and its balance. Such a compensation is called windage. With adjustable sights, compensating for this becomes much easier.

The first type of sight we will look at is the leaf sight. The picture below shows a representative leaf sight.

This type of sight is fold-able for close range shooting. It also has screws for adjusting the sight in both the horizontal and vertical planes and has a number of holes in it for different ranges. This sight is mounted as the rear sight of the weapon and the front sight is fixed. To use this sight, the user estimates the distance to the target and lifts the sight. Then the user looks through the appropriate hole in the leaf sight and aligns it and the front sight to the target. The barrel of the weapon is therefore automatically tilted by the appropriate amount, as the illustration below shows:


For close range shooting, the user folds down the rear leaf sight and uses the top of the hinge as the rear sight. For longer range shooting, the user unfolds the sight and looks through the appropriate hole. There is also a windage screw to compensate for horizontal movement of the bullet.

On some weapons, e.g. the iron sights on some M-16 or AR-15 weapons, both the front sight and rear sight are adjustable. The front sight is used for fine tuning the elevation when zeroing the rifle (we will discuss zeroing sights in a future post) and the rear sight is adjustable for both elevation and windage.

Click image to enlarge.

We discussed these sights in detail previously, during our study into aperture sights.

Another popular type of sight is the tangent sight, which has been used for a number of weapons such as Mausers, Browing Hi-Power pistols, some AK-47 models etc. The picture below shows an exploded view of the parts of this type of sight on a Mauser C-96.


The part to pay most attention to is the sight leaf, which is graduated and has a V-shaped notch on the plate in the rear of the sight leaf. This V-notch is the rear sight through which the user aims the weapon. Also pay attention to the ramp and the pivot ear in the diagram above. When assembled on the weapon, the rear sight looks something like this, from the top view:


The numbers 1-10 indicate the desired range in hundreds of meters. If the slider is set at 1, this is for ranges between 0-100 meters, if set at 10, this is for ranges between 900 and 1000 meters. We will see exactly how the sight works with the next two pictures.


The above image shows the rear sight as it is set for a range of less than 100 meters. Note that the sight leaf is nearly horizontal and the sight slider is at the very back of its travel. Now let us assume that the user pushes the sight slider button and moves the sight slider forward. This is what the sight will look like in that case.


As you can see, the sight slider pushes tangentially against the ramp and pushes the back of the sight leaf upwards. In this case, the sight is set for maximum range and the rear of the sight leaf is pushed fully upwards. In order to align the raised v-notch of the rear sight with the front sight, the user needs to tilt the barrel upwards, which correspondingly increases the range of the weapon.

The third type of adjustable sight we will study is the ladder sight. The ladder sight is usually foldable. It has a movable slider and a graduated scale on one side of it to adjust for range.

Notice the top surface of the slider has a V-notch. The numbers on the graduated scale are barely visible on the right side of the ladder. To aim this weapon, the user aligns the v-notch of the slider with the front sight post and the target. The user can adjust the range appropriately by moving the slider up and down the ladder. The ladder sight is mounted on the top of the barrel and can be folded when not in use.

Another adjustable sight is the tang sight. Unlike the ladder sight, which is mounted on the barrel, the tang sight is mounted behind the action. In fact, the tang sight gets its name from the fact that it is mounted on the action's tang (the tang is the back part of the plate on which the rifle's action is bolted on.)


Tang sights can generally be raised and lowered by means of a screw thread. The above example can also be moved horizontally to adjust for windage. The bolt heads on the tang sight have a graduated scale so that the user knows how much to lower it or raise it to adjust for various distances. Like the ladder sight, a tang sight can be folded when not in use.

The more top-of-the-line ladder sights and tang sights feature precision devices like vernier scales or micrometer gauges for more accurate aiming. The picture below shows one example of a ladder sight with a sliding vernier scale. The slide is moved by turning the knob on top of the sight, which drives a screw thread.


Savvy rifle owners in the wild west would often buy rifles from Winchester, Sharps, Remington etc., but replace their default sights with one of these precision sights made by third party manufacturers, such as Marble Arms Co. and Lyman Gun Sights Co.

Another type is an adjustable folding type sight. The example below is an Matech Buis sight which can be used as an aperture sight on several rifles, such as the M4, Sig etc.

This particular sight is mounted as a rear sight and can adjust for both elevation and windage using the two knobs.

With adjustable sights, it becomes much easier for the user to aim at targets at different ranges. This is why longer range weapons feature adjustable iron sights. While most longer range weapons these days usually feature telescope sights for accuracy, adjustable iron sights are often still present as backup sights.

Monday, November 1, 2010

Sights: Iron Sights: Fixed Sights

We have recently discussed the basics of sights, as well as some history of iron sights and the two major types of iron sights, namely the open sight and the aperture sight. There are also other ways to classify iron sights. One would be fixed sights vs. adjustable sights. We will discuss fixed sights in this post and discuss adjustable sights in the next post.

Fixed sights are the first types of sights ever invented. Back in the early days of firearms, the range of weapons wasn't as much and many weapons weren't rifled either. Hence, there was not as much reason for people to have adjustable sights to adjust for elevation or windage. If a person desired to shoot at a target at a greater range, he would merely aim a bit higher, based on personal experience with the weapon.

In the early days, machining and metallurgical techniques weren't as good as today. In many cases, people simply didn't trust adjustable sights for weapons intended for rough use, because they were thought too delicate and more expensive to produce. For instance, most revolvers from the wild west used fixed sights, whereas some rifles of the same period featured adjustable sights.

In some cases, the sights were actually part of the weapon, not separate pieces. For example, on many Colt and Smith & Wesson service revolvers, the front sight was machined from the barrel's original steel blank and the rear sight was merely a groove cut into the top strap of the pistol frame. In some weapons, such as the colt paterson revolver, there was no separate rear sight and instead, when the user pulled back the hammer, there was a notch cut into it which would serve as a rear sight. Hence, weapons like these had no way to adjust the sights at all.

While we say "fixed sight", it is not entirely true that these sights are fixed. Many an enterprising owner has adjusted such sights by using crude tools such as a hammer or a file. For instance, if a revolver shoots too much to the right, the user may choose to permanently bend the front sight a bit to the right using a hammer. If the weapon shoots a bit too low, the user may file off the top part of the front sight a bit. This is why some weapons may have slightly deformed sights. This is not always due to wear and tear, but may be in that state because the previous owner took some trouble to adjust the sights to his personal preferences.

These days, many short range weapons such as auto pistols or revolvers, still come with fixed sights. For example, many models of pistols from manufacturers such as Glock, Smith & Wesson, Ruger, Colt etc. feature fixed sights.

In some cases, the sights are not entirely fixed. For example, many modern pistols come with the sights fitted on to dovetail joints. Such sights may be adjusted with special tools. Once the sights are adjusted so that the weapon is satisfactorily zeroed in, they are then left alone and are not adjusted by the user again in the field. So these sights could be called "semi-fixed" sights.

Sunday, October 31, 2010

Sights: Iron Sights: Aperture Sights

In the last couple of posts, we studied the basics of sights, some details about iron sights and some details about open iron sights. In this post, we will study another type of iron sight, the aperture sight.

Recall that in open sights, the rear sight is simply a plate or a post with a notch cut in it. The notch is usually a V-shape, U-shape or a square shape. The front sight is merely a post or a bead. The main problem with them is that open sights hide parts of the target when aiming at it and it is slower to acquire a target with them.

An aperture sight is similar to an open sight, except that the rear sight is a ring with a hole cut through the middle of it. The front sight on an aperture sight is similar or identical to an open sight (i.e. it may be a ramp, post or a bead) or it may have a ring too. The user peeps through the rear sight ring and aligns the front sight to the target. Due to the way that the human eye focuses on the front sight and the target alone, the rear sight ring appears as a blurred or a ghost-like ring to the eye. Hence, such sights are also called peep sights or ghost ring sights.

Click image to enlarge

In the above picture, we have an AR-15 A2 rifle (the civilian version of an M16). The two sights are marked in the above picture. The front sight on the left is simply a post type sight. Notice that the rear sight is part of the carrying handle Here's a view of the carrying handle from the other side.

Click image to enlarge

Note the two knobs at the back of the weapon. The lower knob is used to adjust the range of the weapon (by controlling the elevation) and the top knob controls the windage. There is also one more interesting feature about this sight, as the picture below shows
In the above image, we have the actual rear sight piece alone. Note that there are actually two rings here. One has a smaller aperture than the other. The user can switch between one or the other by pressing the piece with a finger. The bigger hole allows the user to pick up targets easily and the smaller hole allows targeting with greater precision. The bigger hole is sometimes marked 0-2 to indicate it should be used for targets between 0 to 200 meters away.

This is what a sight picture through one of these sights would look like:


Because of the way that the eye focuses, the rear sight ring becomes an out of focus, ghostly ring and the front sight is sharp and focussed on the target.


The above image is of a sight picture from a Heckler and Koch MP-5 submachine gun. In this case, the front sight is also a ring with a post in the middle.

These sights share many of the properties of the open type iron sights. Like all iron sights, they are very simple to use. These sights may be fixed or adjustable type to adjust for range. They are relatively small and unobtrusive (though not as small as open sights) and don't affect the balance of the weapon much. Rain and fog don't affect these sights at all. Like the open sights, some of these sights may have tritium filled glass tubes, so that they can easily be picked up in the dark. They are also fairly cheap to manufacture.

Like all other iron sights, they have the disadvantage that they have no magnification or night vision enhancement and therefore depend on the user's eyesight alone.

These sights have one big advantage over open sights though. With open sights, there are three points that the human eye has to focus on simultaneously: the rear sight, the front sight and the target. Since these three points are at different distances from the eye, it is hard to focus on these simultaneously. In fact, only younger people with good eyesight can do this properly. Older people and people with far-sightedness find it much harder to do this correctly and hence it makes it harder to aim an open sight. With an aperture sight, there are only two focus points to handle: the front sight and the target. The eye simply centers around the rear sight ring automatically and it appears as a ghostly ring. This makes it much easier to aim the aperture sight quickly and easily.

This is why aperture sights became popular for several military rifles in the last few decades. They are the best all-round type of iron sight by far. They have been used with weapons like the M1 Garand rifle, the M16 family, some Lee-Enfield rifles e.g. the well known Enfield No. 4 SMLE rifle from World War II etc.

Aperture sights first started to gain popularity in the late 19th century for rifles. The early aperture sights came in two types, the tang type and ladder type. The difference between the two really has to do with where the rear sight is placed and adjusted. On a ladder type, the rear sight is on the barrel and can be folded down when not in use. The rear sight can be slid up and down the ladder to adjust for range. The tang type is mounted behind the action and is therefore closer to the user's eye. Tang sights could also be folded down and the aperture moved up and down for range. They could also be adjusted for windage. Many sights also had vernier scales or micrometers (screw gauge) attached, so that they could be adjusted more precisely. Such sights were often made by third party specialist manufacturers, such as Marble Arms Co., Lyman Gun Sight Co. etc., and often installed separately by the owner of the rifle. Sights like these were common in the wild west and used in historically significant rifles such as the Sharps rifle, Winchester model 1894 lever action rifle etc., which we've already dealt with in some previous posts.


The two images above are a ladder and a tang sight. The first one has a vernier scale attached to the side and the second one has screw gauges. The second one can be adjusted both horizontally and vertically to adjust for for windage and elevation. Both may be folded when not in use.

To illustrate the difference between open sights and aperture sights, take a look at the two images below:


These are two images of the same target taken from two different rifles at different distances. The first image is through an open sight of an AK-47 at 50 yards and the second is through an aperture sight of an AR-15 at 25 yards.

Aperture sights remained very popular for both military and hunting applications for a very long time, until reasonably priced good telescope sights became available. They are still available on many weapons to use as backup sights, in case the high tech sights fail.

Saturday, October 30, 2010

Sights: Iron Sights: Open Type Sights

In our previous post, we studied some basics about iron sights. Now we will study one of the types of iron sights, the Open sight.

In an open type sight, the rear sight is merely a piece with a notch cut in the middle. The notch is typically V-shaped, square shaped or U-shaped. The front sight is usually some kind of ramp or post.
The above picture is an example of an open-type sight. It is typically made of steel or polymer. Note the rear sight is merely a small piece with a square notch in the center. The front sight is a small post type. In the above example, the front sight is fixed to the barrel, but the rear sight may be slid left or right using proper tools, to adjust the horizontal alignment of the sight. In the above example, the rear sight also has a white line surrounding the notch, to give it greater contrast from the surroundings, to make it easier to aim.

In some cases, the front and rear sights also have small dots of some material that glows in the dark (e.g.) glass tubes filled with tritium gas. This helps in picking up the sights in the dark as well.


Since tritium is a radioactive form of hydrogen, it slowly decays and emits light as it does so. Therefore, sights like these don't need any batteries and could easily last 10 years or more. These sights are much more visible in low light conditions.

These sights are characterized by their simplicity of design. There is not much that can go wrong with them. They are also small and unobtrusive, so they don't affect the balance of the pistol much at all. They also can't get caught easily on clothing or holsters because of their small size and shape. Hard blows may bend or move the sights out of alignment though, but on the whole they are pretty durable. Rain, fog and snow don't affect these sights much at all. These sights are cheap to manufacture and don't use batteries or electronics, so there is less to go wrong.

These sights are not as precise as other sights though. Square shaped notch on the rear sight provides the best accuracy of different open iron sight types. Other types are not as precise and also take longer to aim. Peering through the sights also obscures other details which are covered up by the sides of the sights.

Sights like these are pretty useful up to about 300 meters or so, though most average shooters can shoot them typically to 100 meters or so. These are therefore typically used by shorter range weapons such as civilian shotguns, police revolvers and pistols etc.

One famous assault rifle that was originally designed with open type sights is the AK-47. The rear sight is an adjustable one with a simple V-shaped notch cut on it, while the front sight is a post. The rear sight may be slid forwards and backwards to adjust for range. One may now purchase AK clones with other types of sights as well, but the original version was designed with open-type sights, which is typical for this simple, reliable weapon.

Sights: Iron Sights

In our previous post, we learned a bunch of basics about sights in general. The first type of sights we will study are called Iron Sights. The name itself is a bit of a misnomer these days, as this type of sight is rarely made of iron in modern times. Steel or polymer plastic are usually the materials of choice these days. However, in the early days of firearms, these were indeed made of iron and the name is a historical one.

So what is an iron sight? It consists of two pieces, the front sight, which is fastened towards the front of the barrel (muzzle) and the rear sight, which is fastened near the back of the barrel (the breech). These pieces may be fixed or adjustable to accommodate for range and windage. Aiming is done by using the human eye alone. There is no device for magnification (such as a telescope) or low light conditions (night vision device), just the two pieces. The user simply lines these two pieces onto the target and then pulls the trigger. The two pieces for most iron sights are in the shape of a bead, a post or a ring, or combinations of each (e.g. front sight may be a post and rear sight may be a ring, or both sights may be posts etc.)

There are two main categories of iron sights: (a) the open type and (b) the aperture type. We will study more about these types of sights in the following posts.

Iron sights are usually characterized by the following features:
  • Simplicity: There is very little that can go wrong with iron sights, as they are very low tech indeed, compared to some other types of sights. They are mostly immune to recoil effects. Since iron sights don't have any electronics or batteries, there is less that can go wrong with them.
  • Weather resistance: Iron sights are usually pretty sturdy and are not much affected by the effects of weather and temperature.
  • Ease of training: These are pretty basic sights and it doesn't take a brain surgeon to figure out how to use them.
  • Durability: Most sights are pretty resistant to shock, unlike other types such as telescopic sights. Since iron sights are usually smaller and low-profile, they are usually less likely to get knocked out of alignment when handling the gun. However, hard blows can sometimes knock even iron sights out of alignment.
  • Less weight: Iron sights are very light and do not affect the balance of the gun much. This is unlike other types of sights, that may be much more bulky.
  • Cheap: Since they are so low-tech, they are also very cheap to manufacture.
There are also some disadvantages with using iron sights:
  • Lower precision: Not as precise as some other sight types and also difficult to adjust accurately.
  • Lower range: Since there is no image magnification with iron sights, the aiming is based on how good the user's eyesight is.
  • Reduced field of view: The front and rear sights will block out some of the surroundings when the user lines them up with the target, especially the lower half of the target.